
IN THIS SECTION: General steps are given to acquaint you with the software and hardware installation process of an automated duplicator.
INStallation
This section will provide general steps in setting up and installing hardware and software for your automated duplicator. Models and components will vary, so always check your vendor instructional manual before beginning the installation process. You will need administrator privileges for installation with both Windows XP and Mac OSX.The typical parts included with an automated duplicator/printer unit are:
• Power Cord
• USB 2.0 Interface Cable (Beige)
• Ink Cartridge
• Software installation Disc
• Duplicator hardware unit (in one or two parts)
Step 1: Software installation
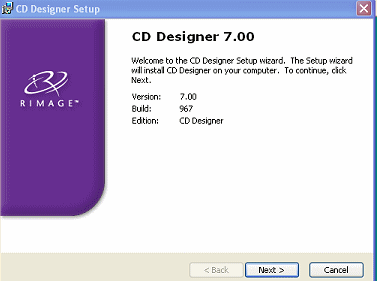
Installation of software from the disc that accompanied your hardware is usually the first step in the setup process. This is because necessary drivers are installed before hardware is connected, thus ensuring a trouble-free recognition process for hardware and software. Insert the disc that came with your duplicator and follow the instructions that appear on screen. You may be prompted to browse out to the manufacturer’s web site if it is determined that a software or firmware update is available for your product. If this is the case, follow the instructions on the manufacturer’s web site regarding downloading the update and subsequent installation. If your duplicator includes printing functions, label maker software will also be installed. Figures 1a and 1b are representative of duplicator software being installed.
Figure 1a: Initial installation of duplicator software.
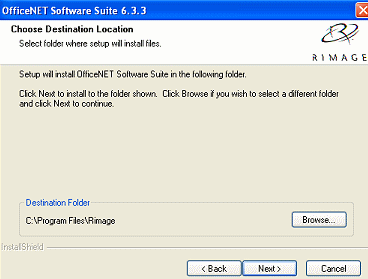
Figure 1b: Label and design software is installed.
Once the software has been successfully installed, the
next step is connecting your duplicator to your PC.
Step 2: Connecting the duplicator to your PC or Mac
Applying Power
• Locate the duplicator’s power cord supplied by the
manufacturer. Plug the power cord adapter into a
surge-protected outlet and plug the power plug into the
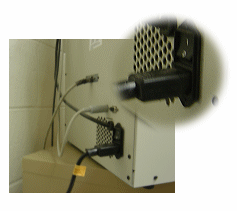
power port of your duplicator unit. As Figure 2 depicts,
this port is
typically located on the rear of the unit.
Figure 2: Rear view of duplicator showing duplicator
power cord connection.
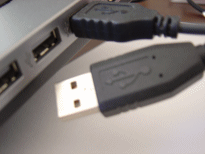
• Locate the USB 2.0 power cord supplied by the manufacturer. As shown in Figure 3a and 3b, connect the USB 2.0 cable from the duplicator unit to an available USB port on your computer.
Figure 3a: Connecting the USB cable to the
duplicator unit.
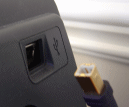
Figure 3b: USB 2.0 power cord connecting to USB port on
computer.
Other connections
• Depending on the model of your duplicator, the printing unit may not be fully integrated into the power process that has already been connected. If this is the case, you will need to connect additional cords and cables. There may an additional power source cable, as well as an additional USB 2.0 cable. You would follow the same procedures as outlined above for available connection ports.
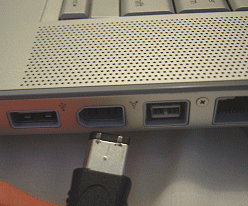
If you have a duplicator unit that requires a FireWire cable and connection, take care to note the difference between the FireWire and USB ports when connecting the FireWire Cable. Notice in Figure 4, the USB port is the first port from the left and the FireWire port is the second port from the left.
Figure 4: FireWire cable and port connection on computer.
Step 3: Hardware recognition
At this point, all cables should be connected from the duplicator unit to the PC or Mac as well as general power connection. Power on your duplicator unit by locating the power switch and setting it to the "on" position. If using Windows OS, your computer will display the Found New Hardware Wizard. Follow the directions on screen to step through the wizard. Choose the "install software automatically" option to install any drivers needed for the duplicator and/or printer. At this point, the on screen instructions may prompt you to install the printer ink cartridge.
Step 4: Install ink cartridge
• Locate and open the section of your duplicator that houses the printer portion of your duplicator. You may need to refer to your manufacturer's manual for this step. Once you lift the printer access door, the ink cartridge cradles will shift and move to the right side of the printer.
• Locate and unwrap the ink cartridge that came with your duplicator.
• Lift the ink cartridge latches
• Carefully slide the ink cartridges into the cradles as shown.
Figure 5: This figure shows the ink cartridge insertion with latches up, both cartridges installed, and latches closed.

• Close each
cartridge latch.
• Close
the access door. The printer initializes.
Step 5: Copy CD/DVD Test
•
After
installation of hardware and software, you will want to
run a test burn of a CD or DVD to make sure everything
is operating correctly. Follow your manufacturer's
instructions for loading a blank disc (or more than one
should you choose to test a batch burn) into your
duplicator's auto-loading holder.
•
Launch the duplicator's software you installed in step
one. Most manufacture's software comes with a "Quick
Disc" drag and drop feature, as shown in in Figure
6, which allows you to quickly
load a master copy (or chose from a location on your
hard drive) to burn. Follow the instructions on screen
to complete the duplication effort.
Figure 6: Drag and drop quick disc option for batch or
single burning jobs.
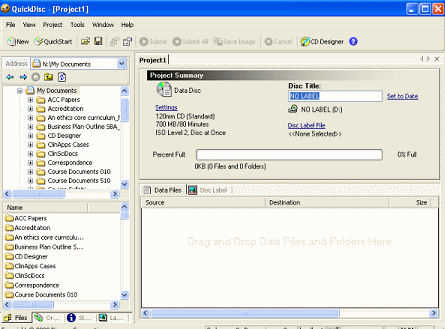
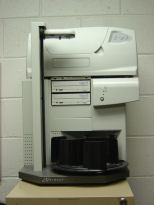
Figure 7: An
automated duplicator with printer option, front view.
Next section: Troubleshooting